# Connecting a domain to a tracker via Cloudflare
In most cases, Cloudflare is used to proxy domains, and change real IP addresses when traffic passes through this cloud service.
# Registration on Cloudflare and domain adding
To use Cloudflare you must complete registration there, and after it will be possible to add domains.
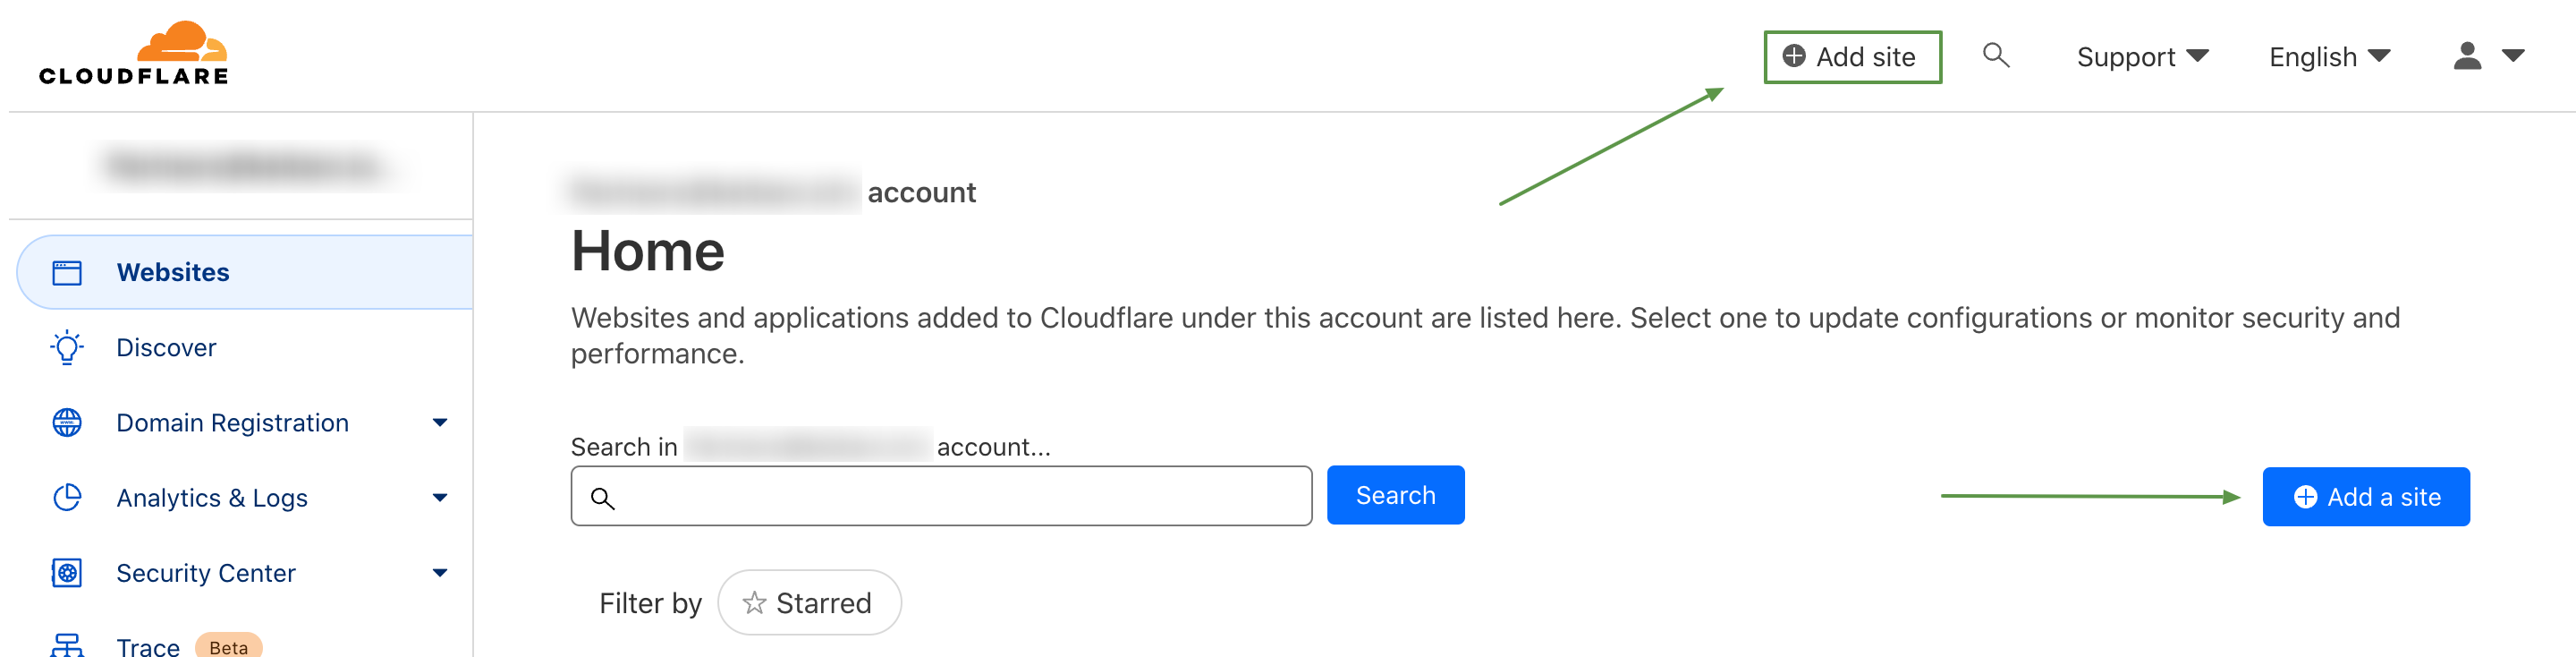
Go to the main page of the site and click on the button +Add a site (or +Add site)
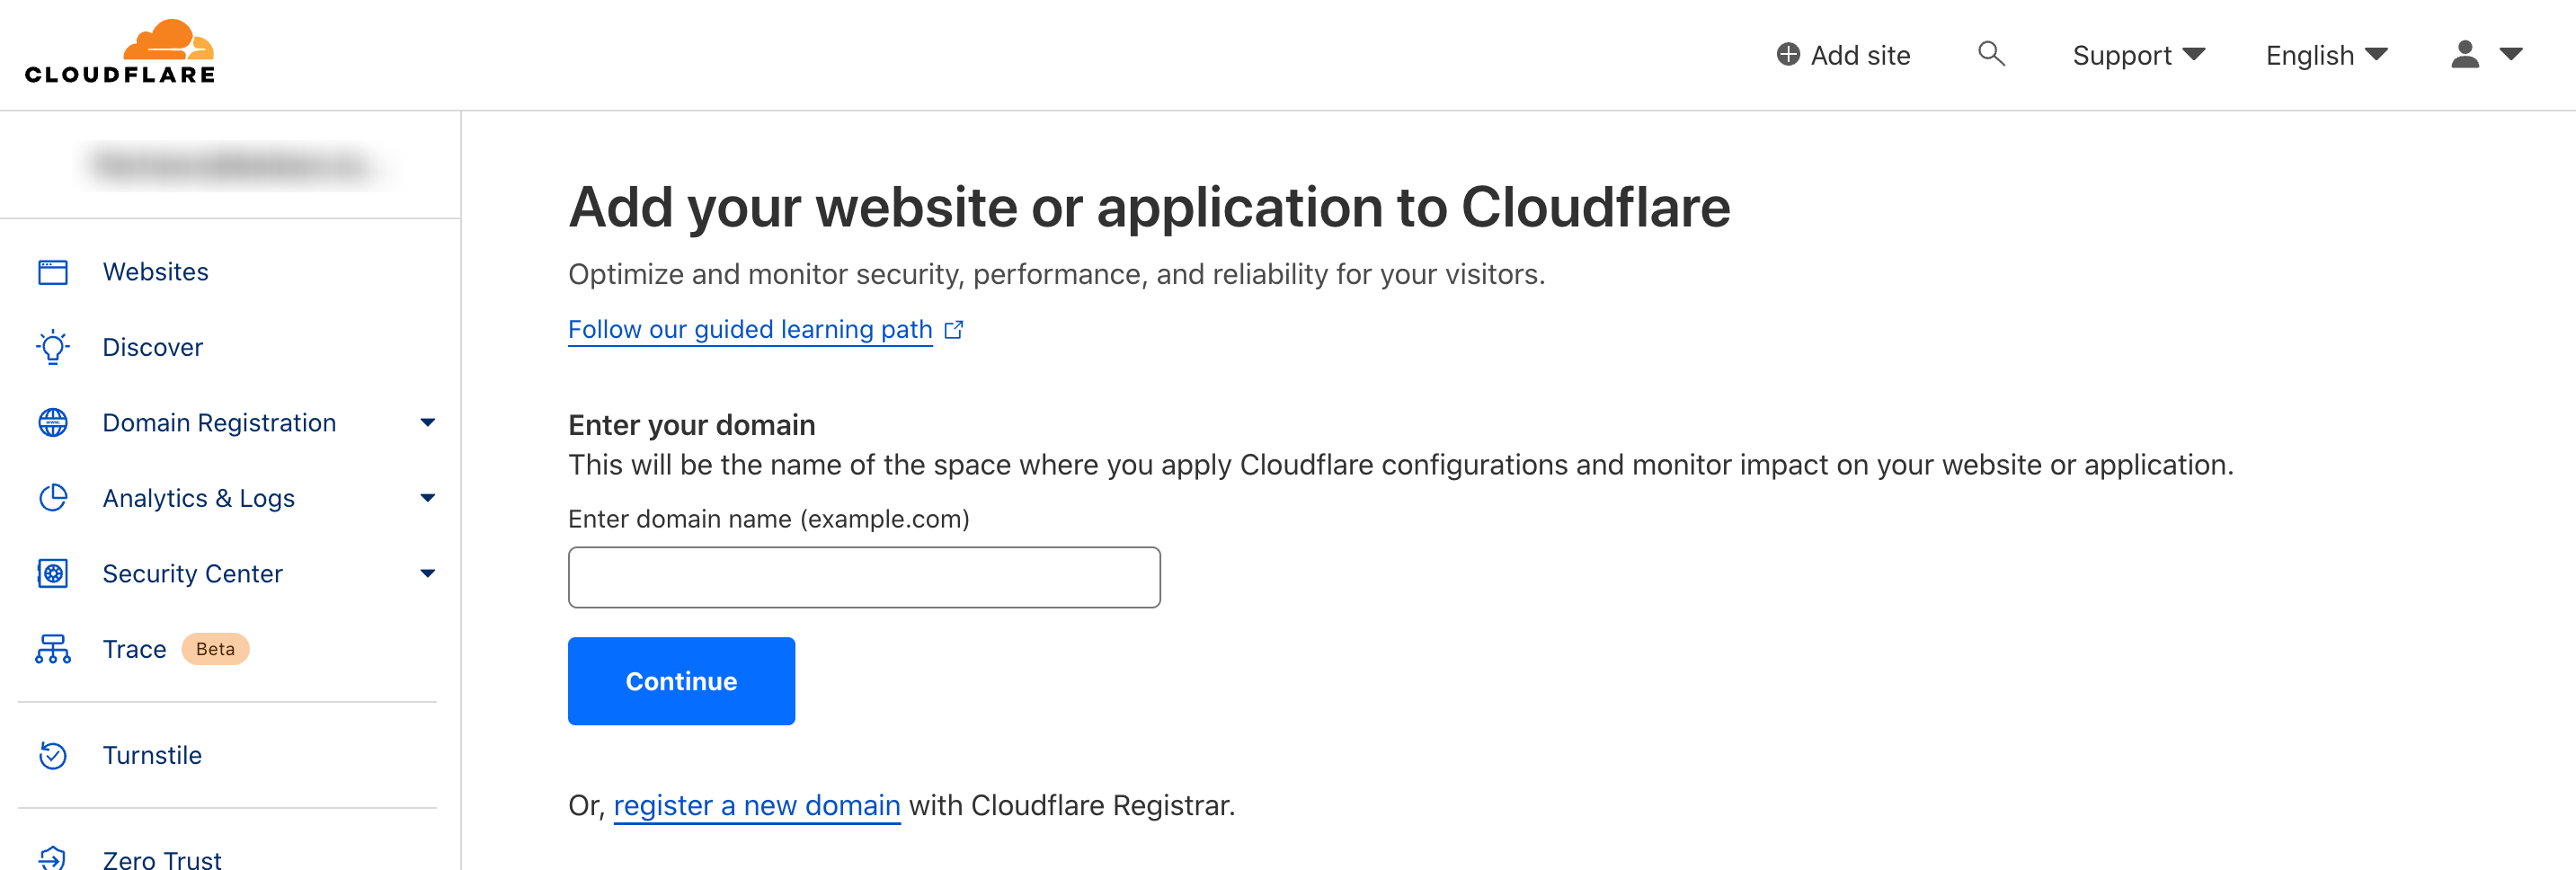
Add your domain to this field:
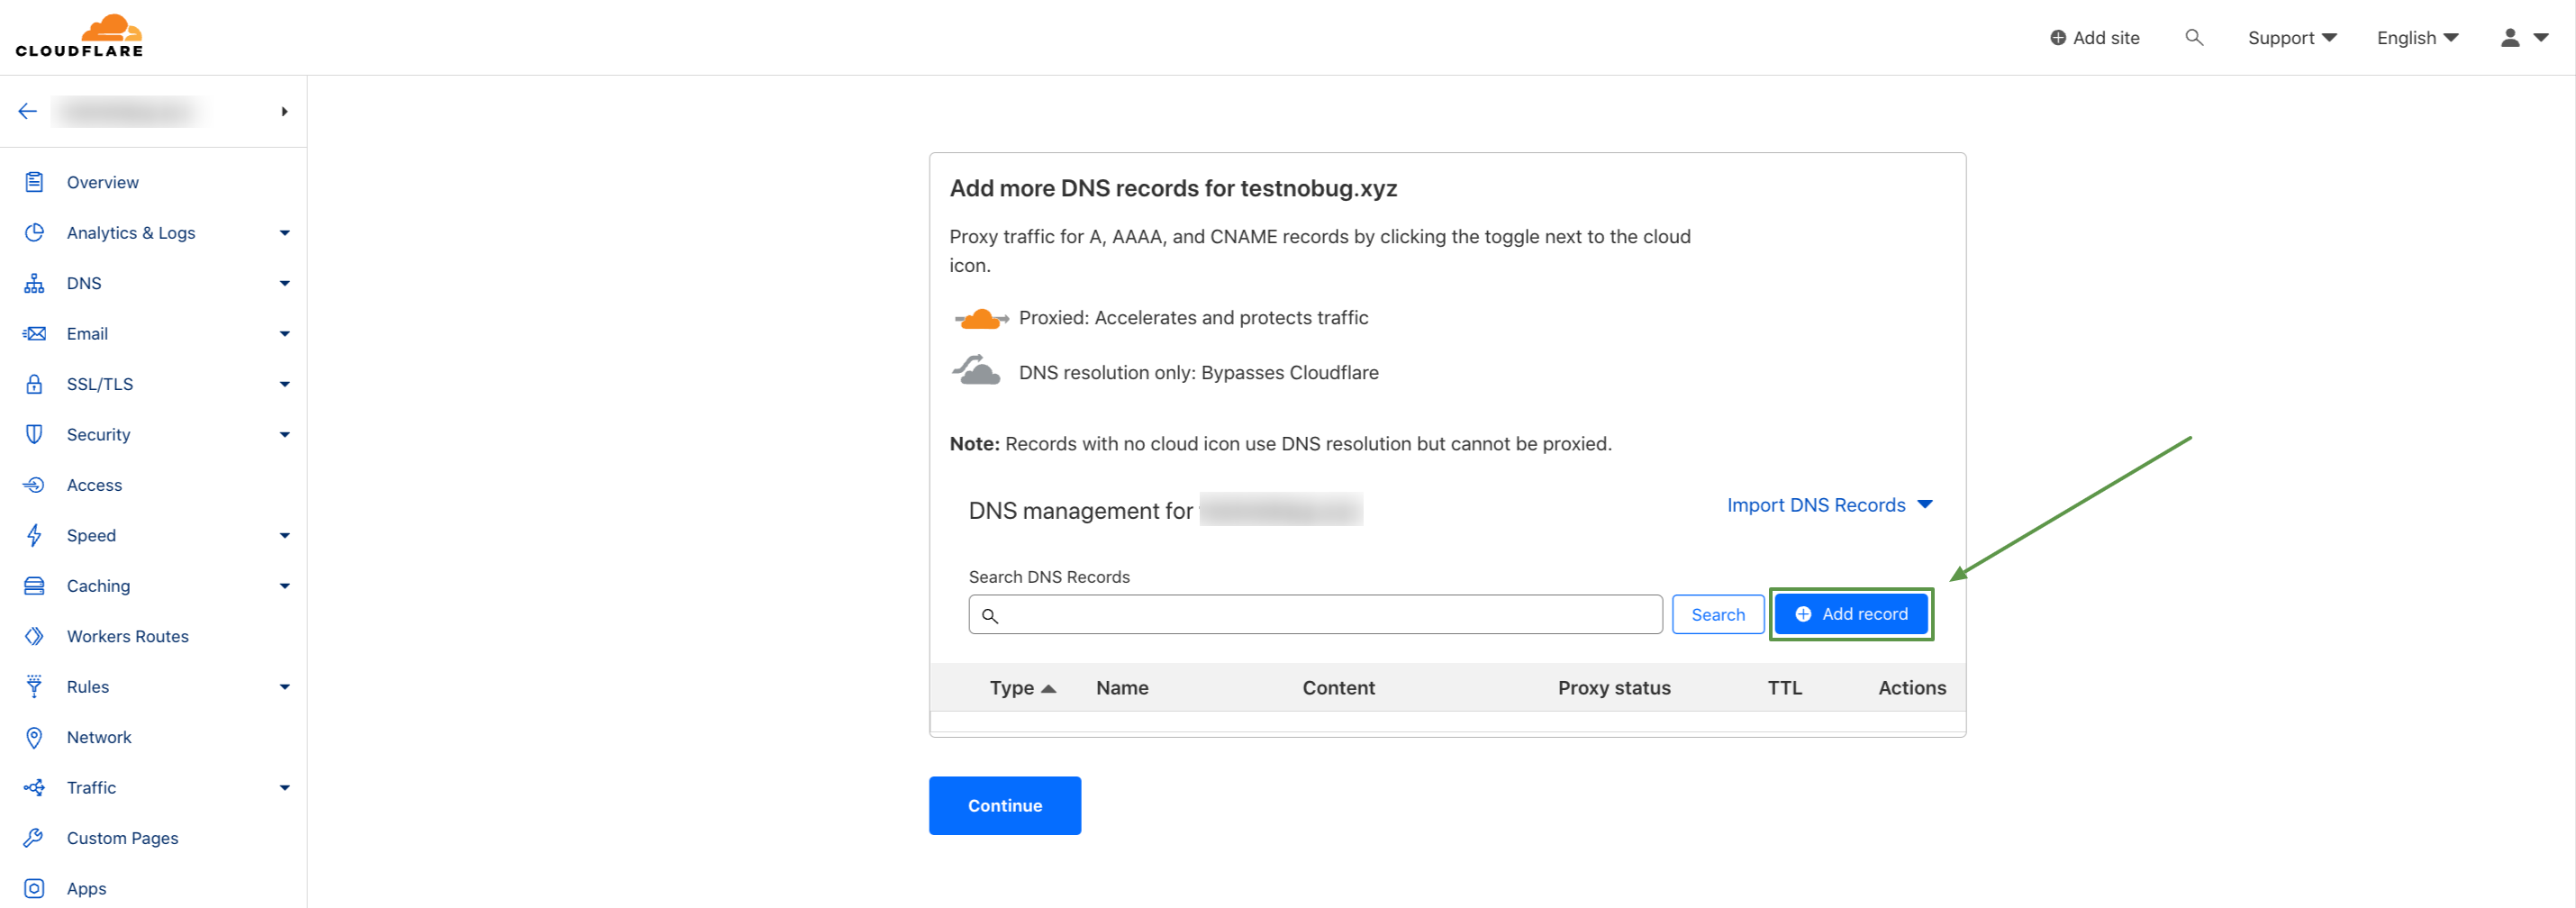
Then specify the Keitaro tracker's IP in the A records. Remove any unnecessary entries.
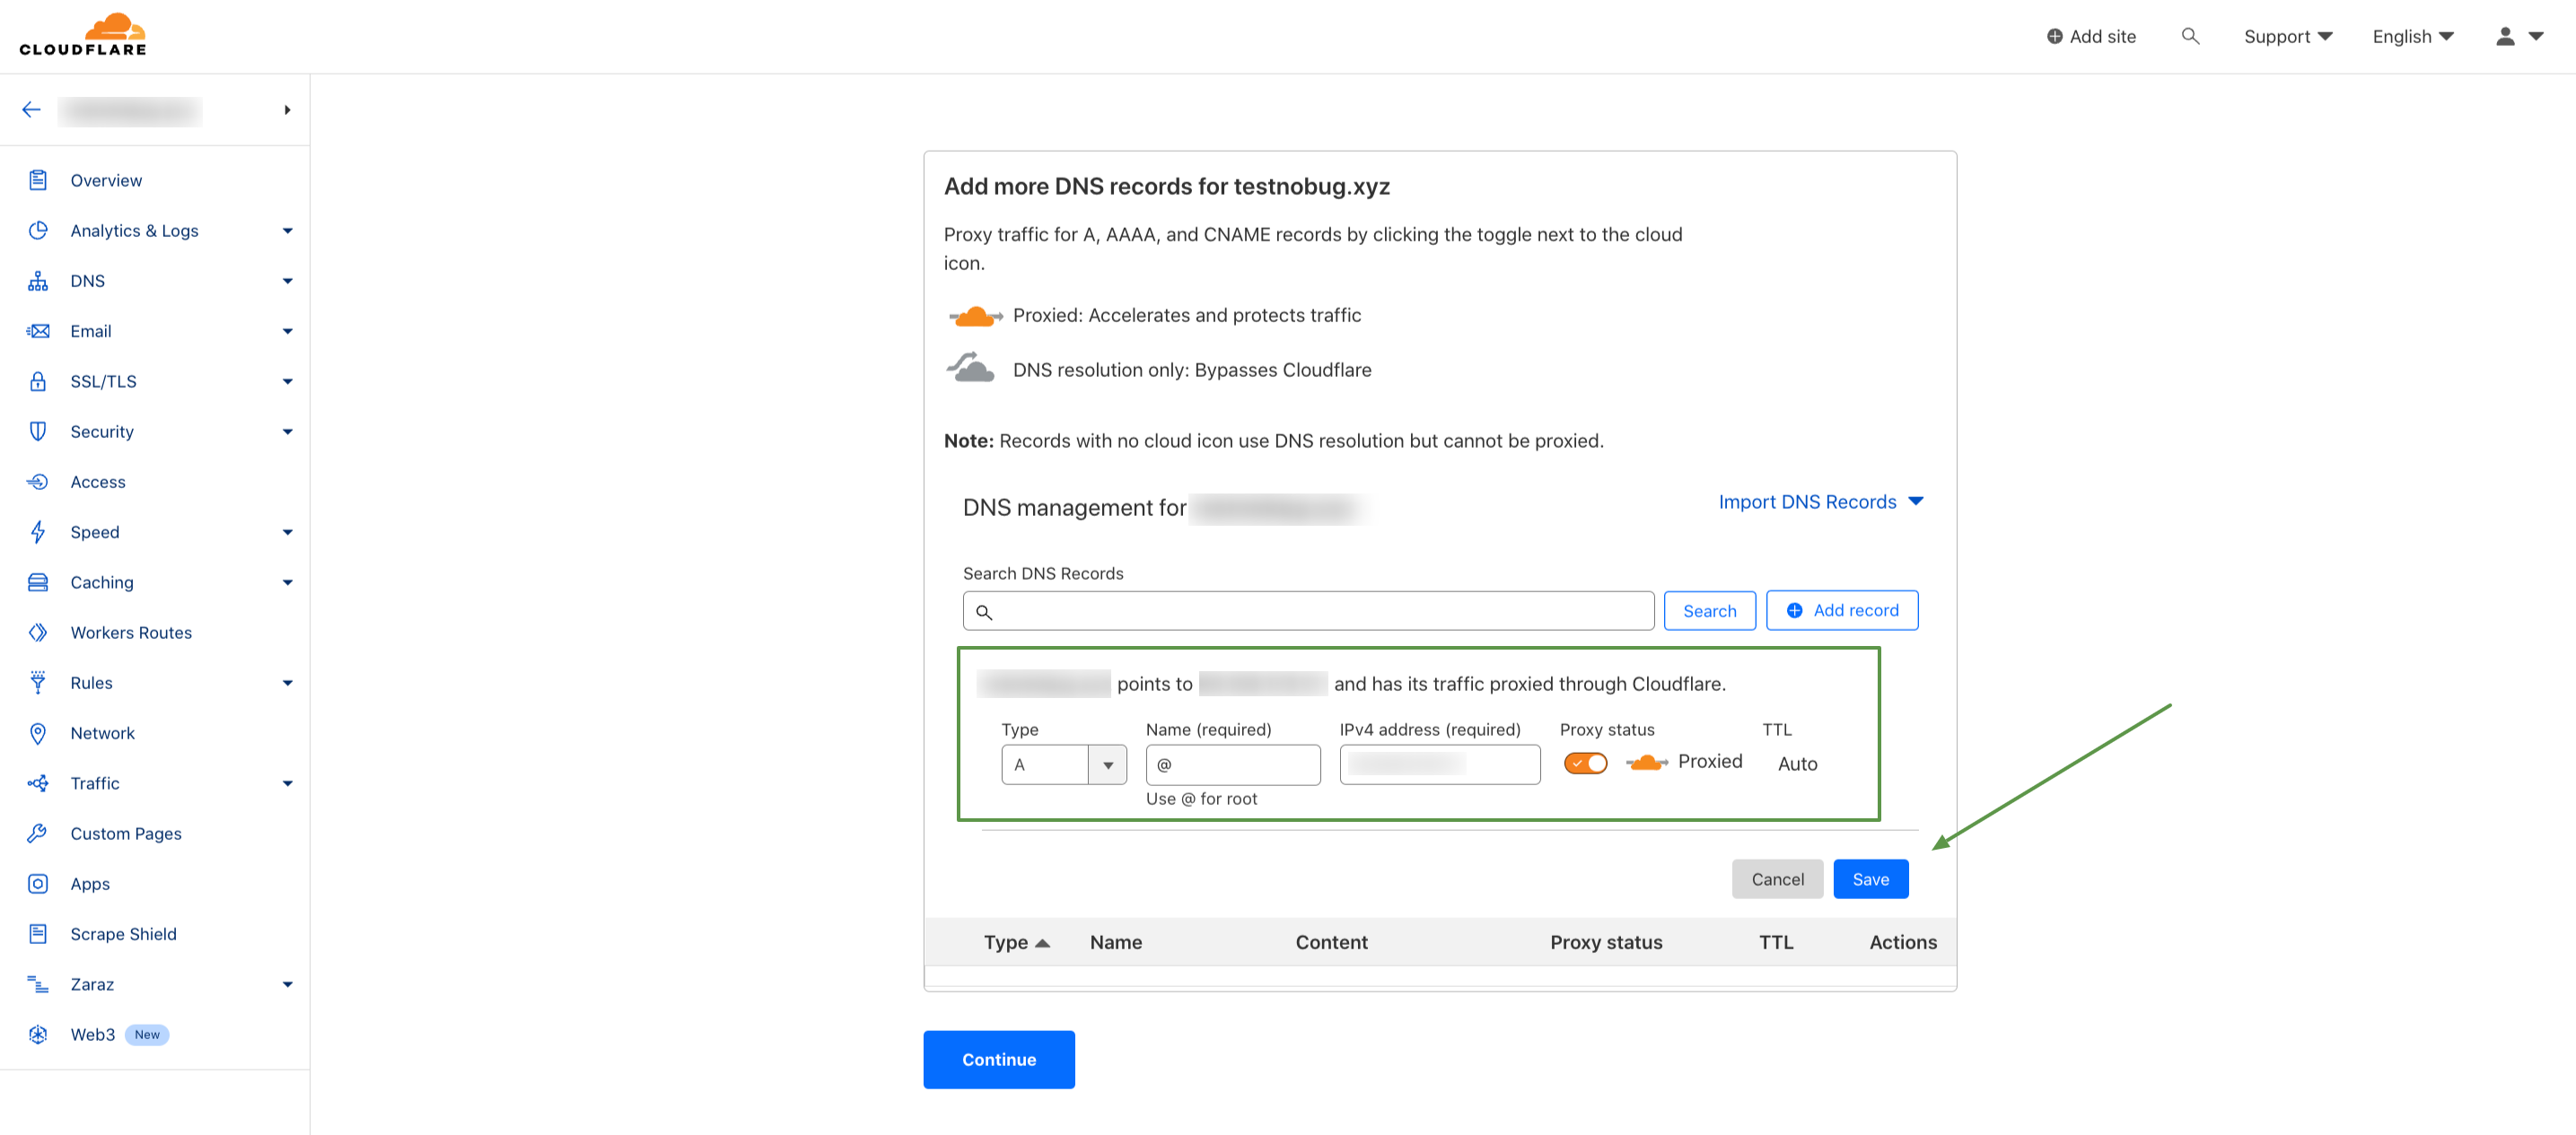
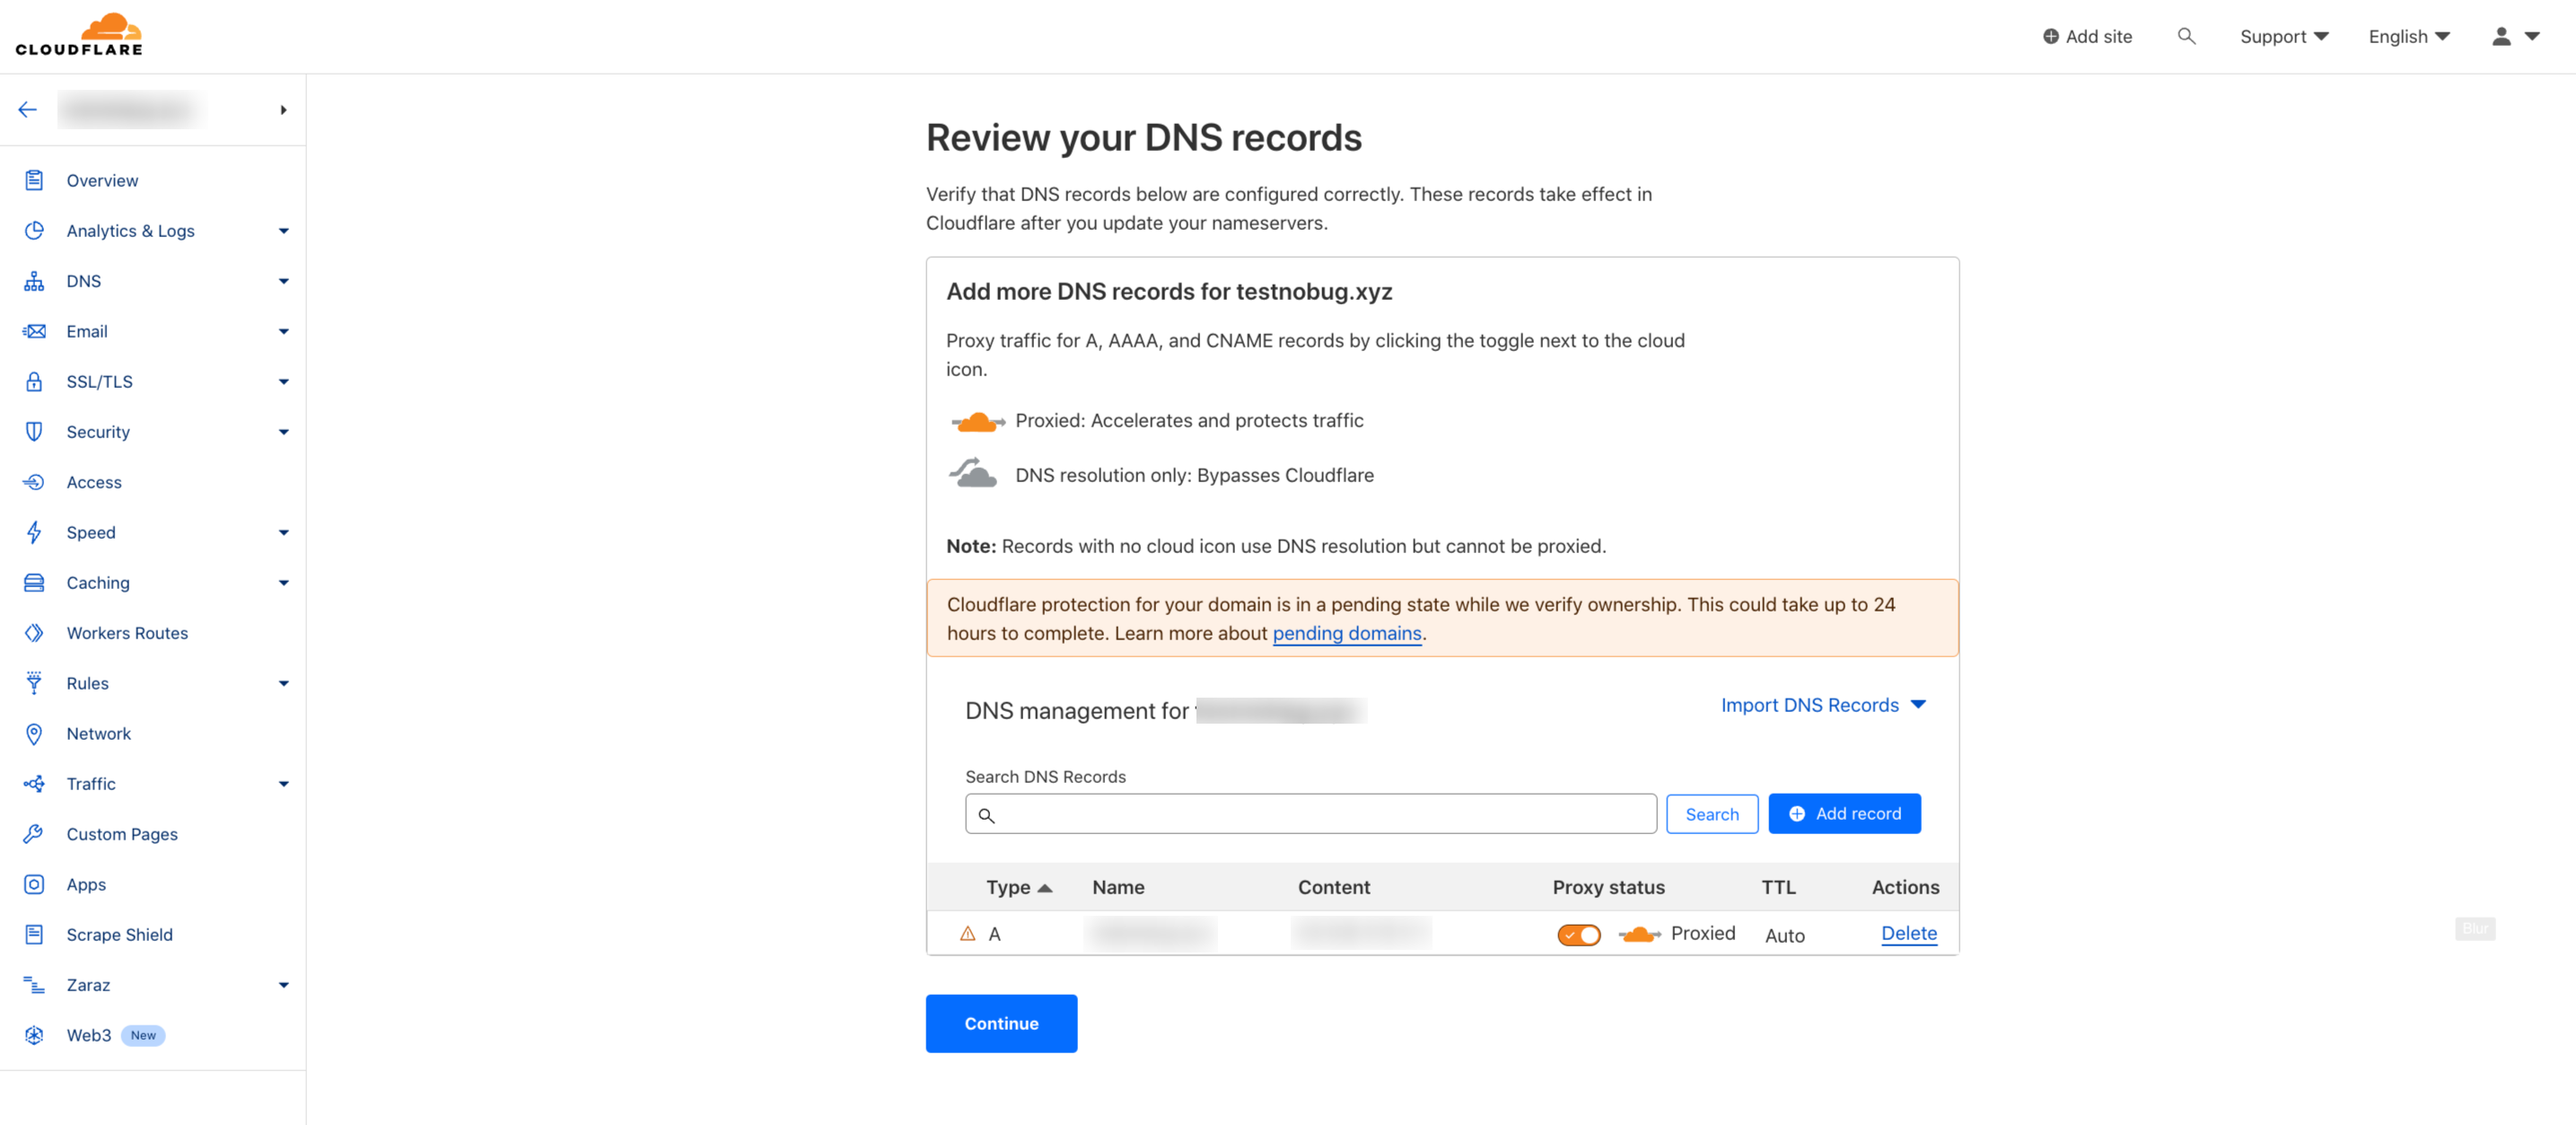
Confirm the changes and move on. Now Cloudflare gives us their NS records and asks us to replace them in the domain settings:
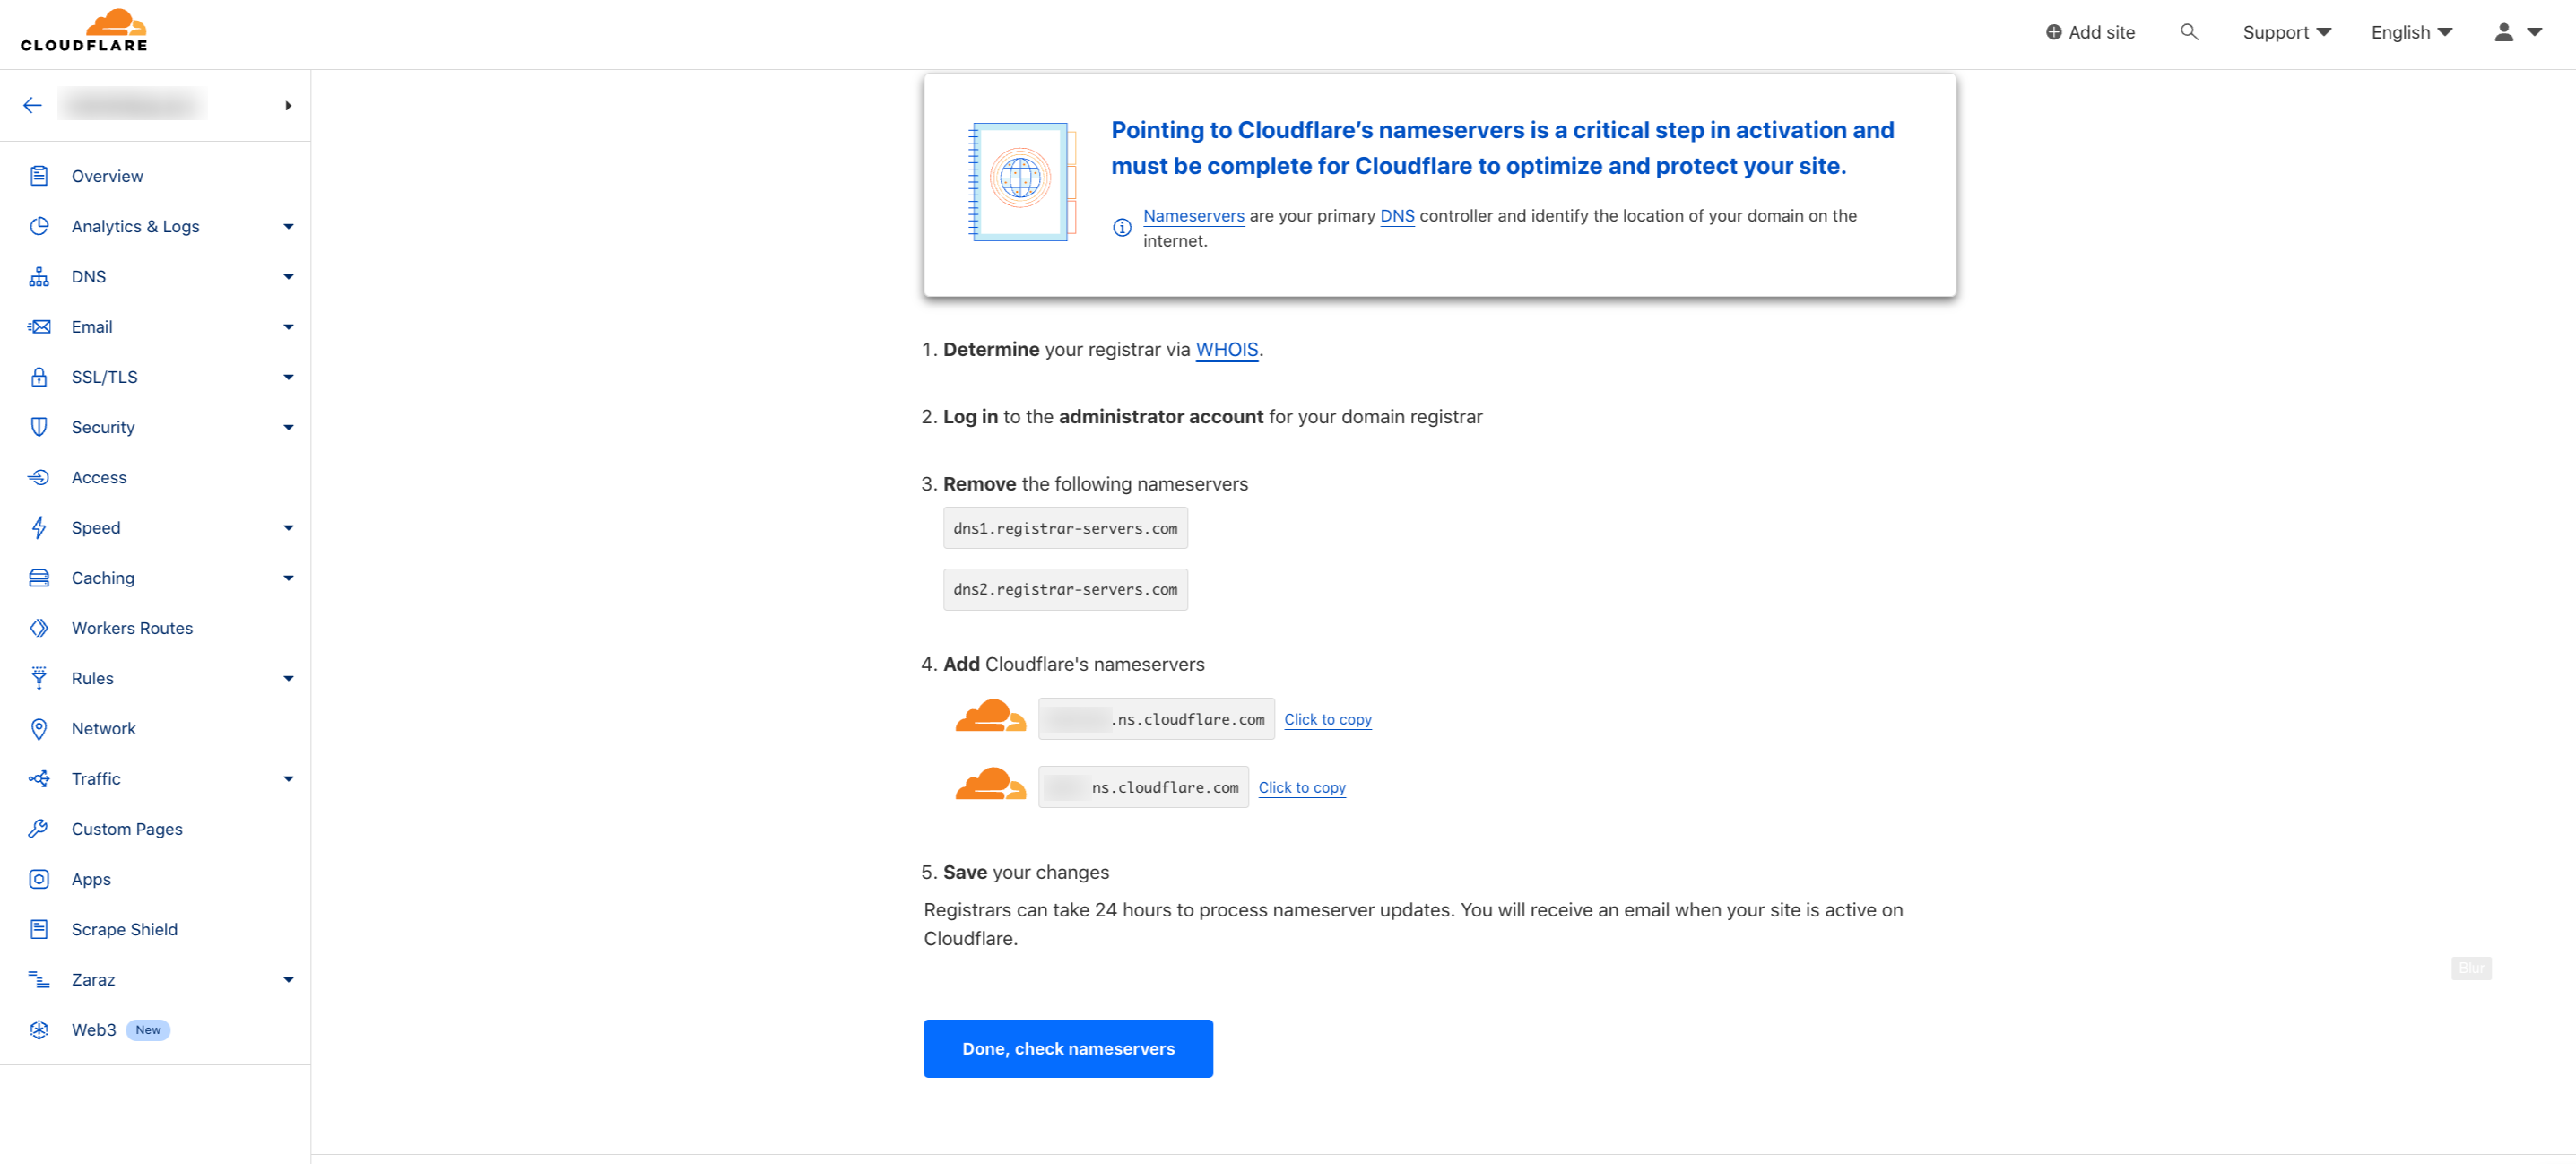
Copy the records and navigate to the domain settings at the registrar (where you purchased the domain).
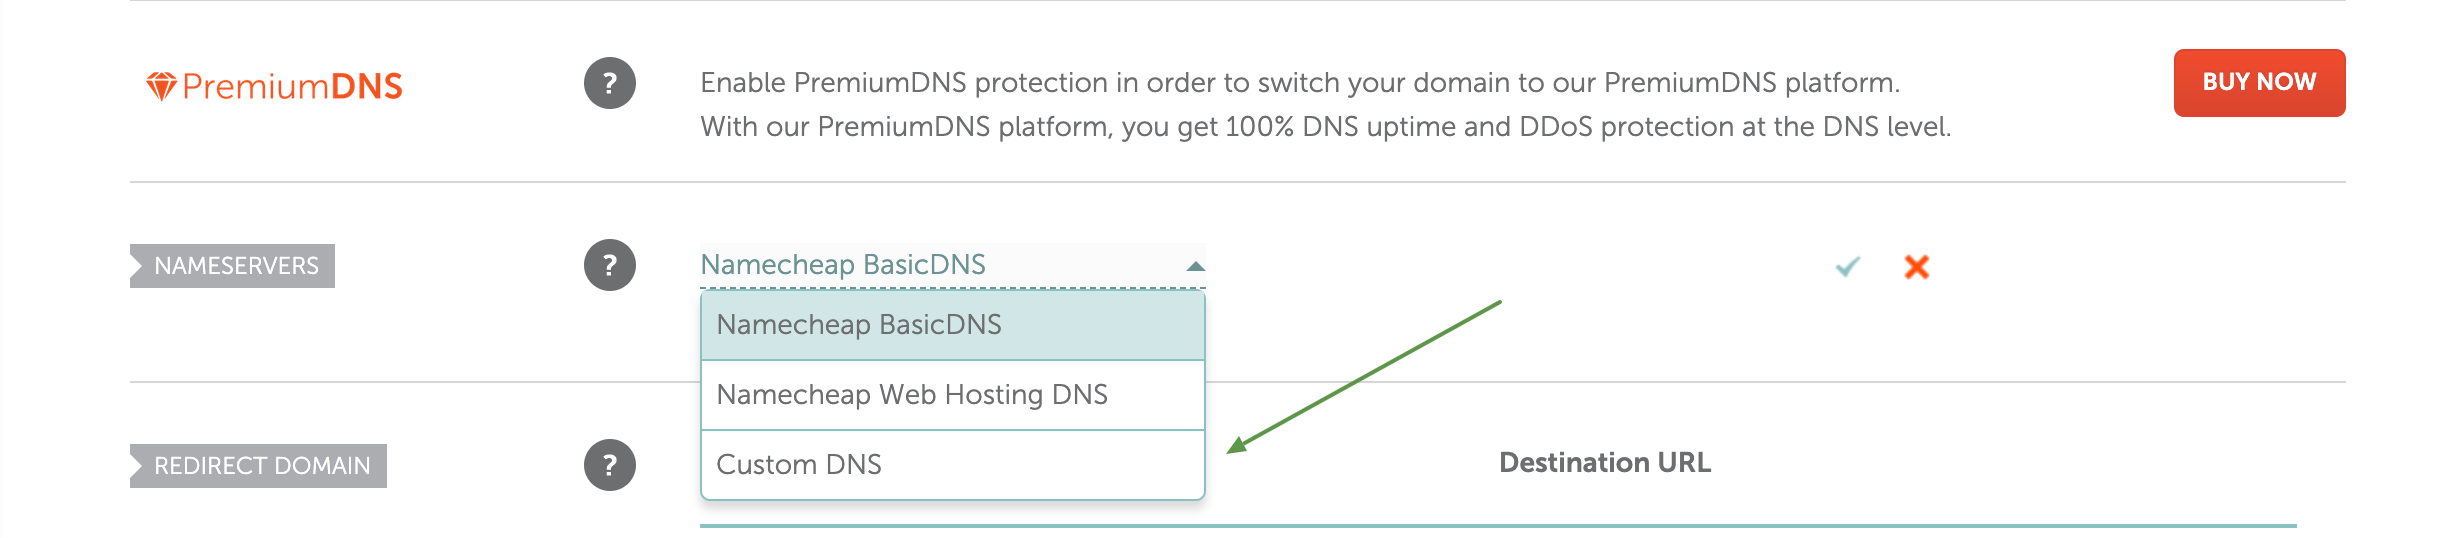
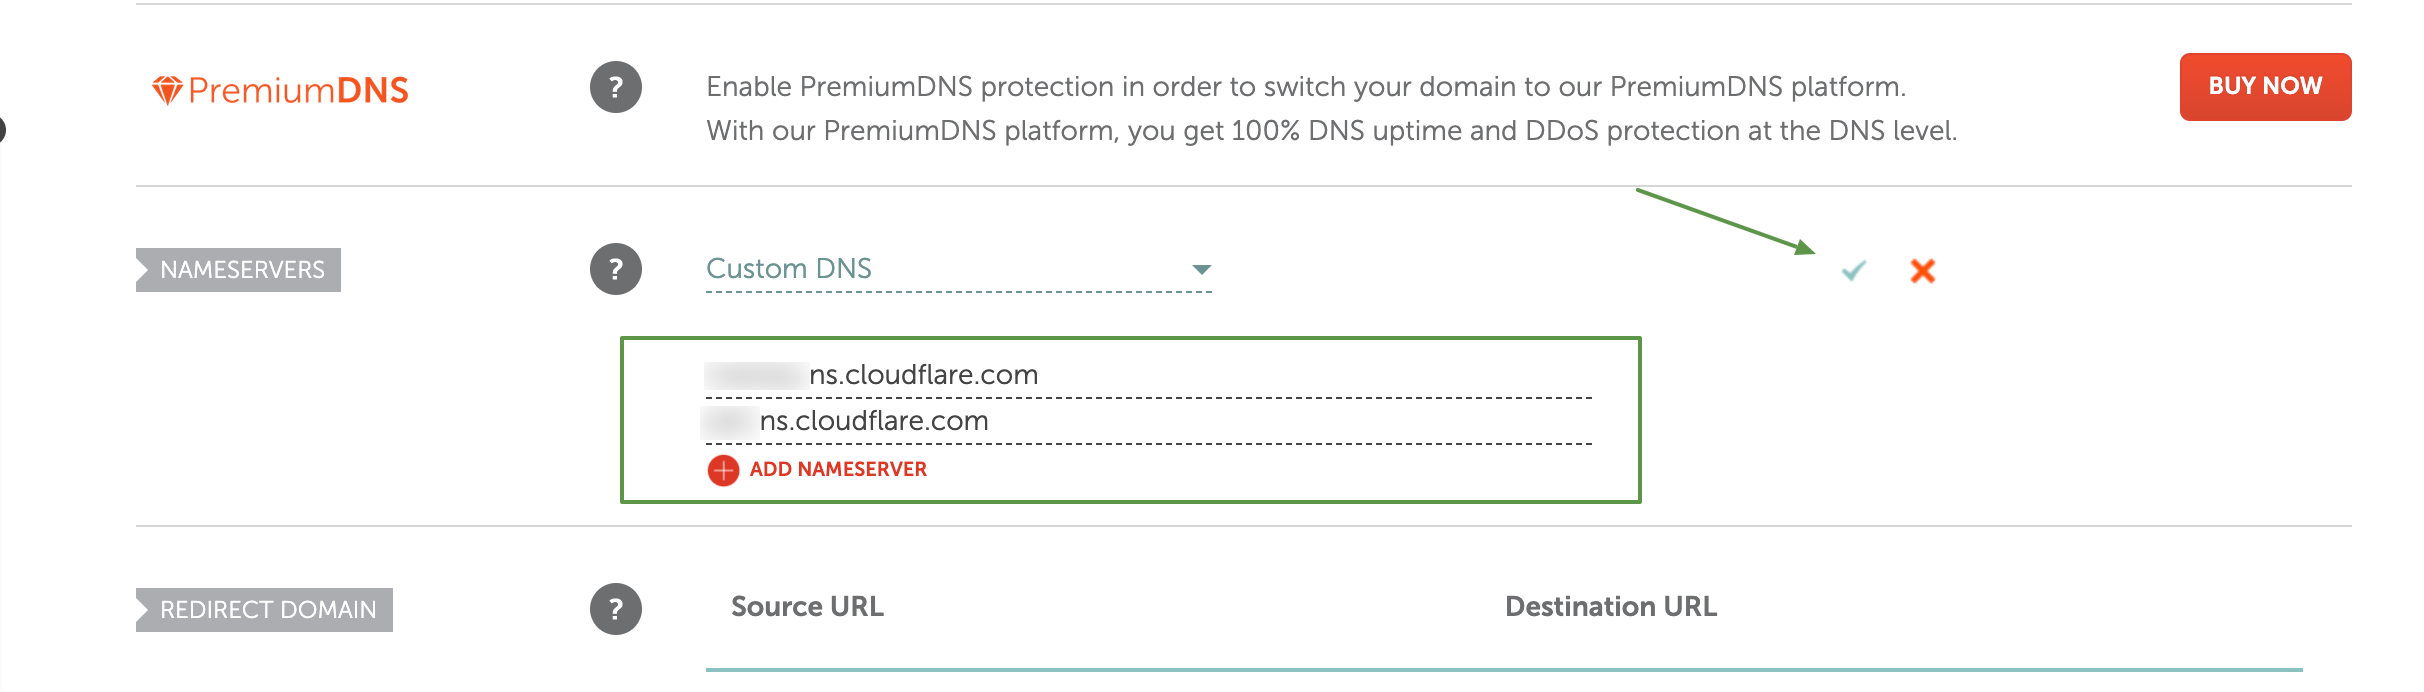
In our example, we'll use Namecheap. Open the domain settings. On the first tab, specify custom DNS:
Put them and confirm changes.
Return to Cloudflare and confirm the changes.

Afterward, you will be prompted to go through the Quick Start Guide: you can either complete it or click Finish later.
Cloudflare will start the verification procedure. Please wait for the NS records to update. The process may take up to 24 hours, but with Namecheap, it typically takes around 1 to 5 hours. Once the NS records have been updated, and Cloudflare is connected, the domain status will become active:

# SSL
Cloudflare automatically issues an SSL certificate for your domain. Go to the SSL/TLS domain settings and check if the certificate is active:
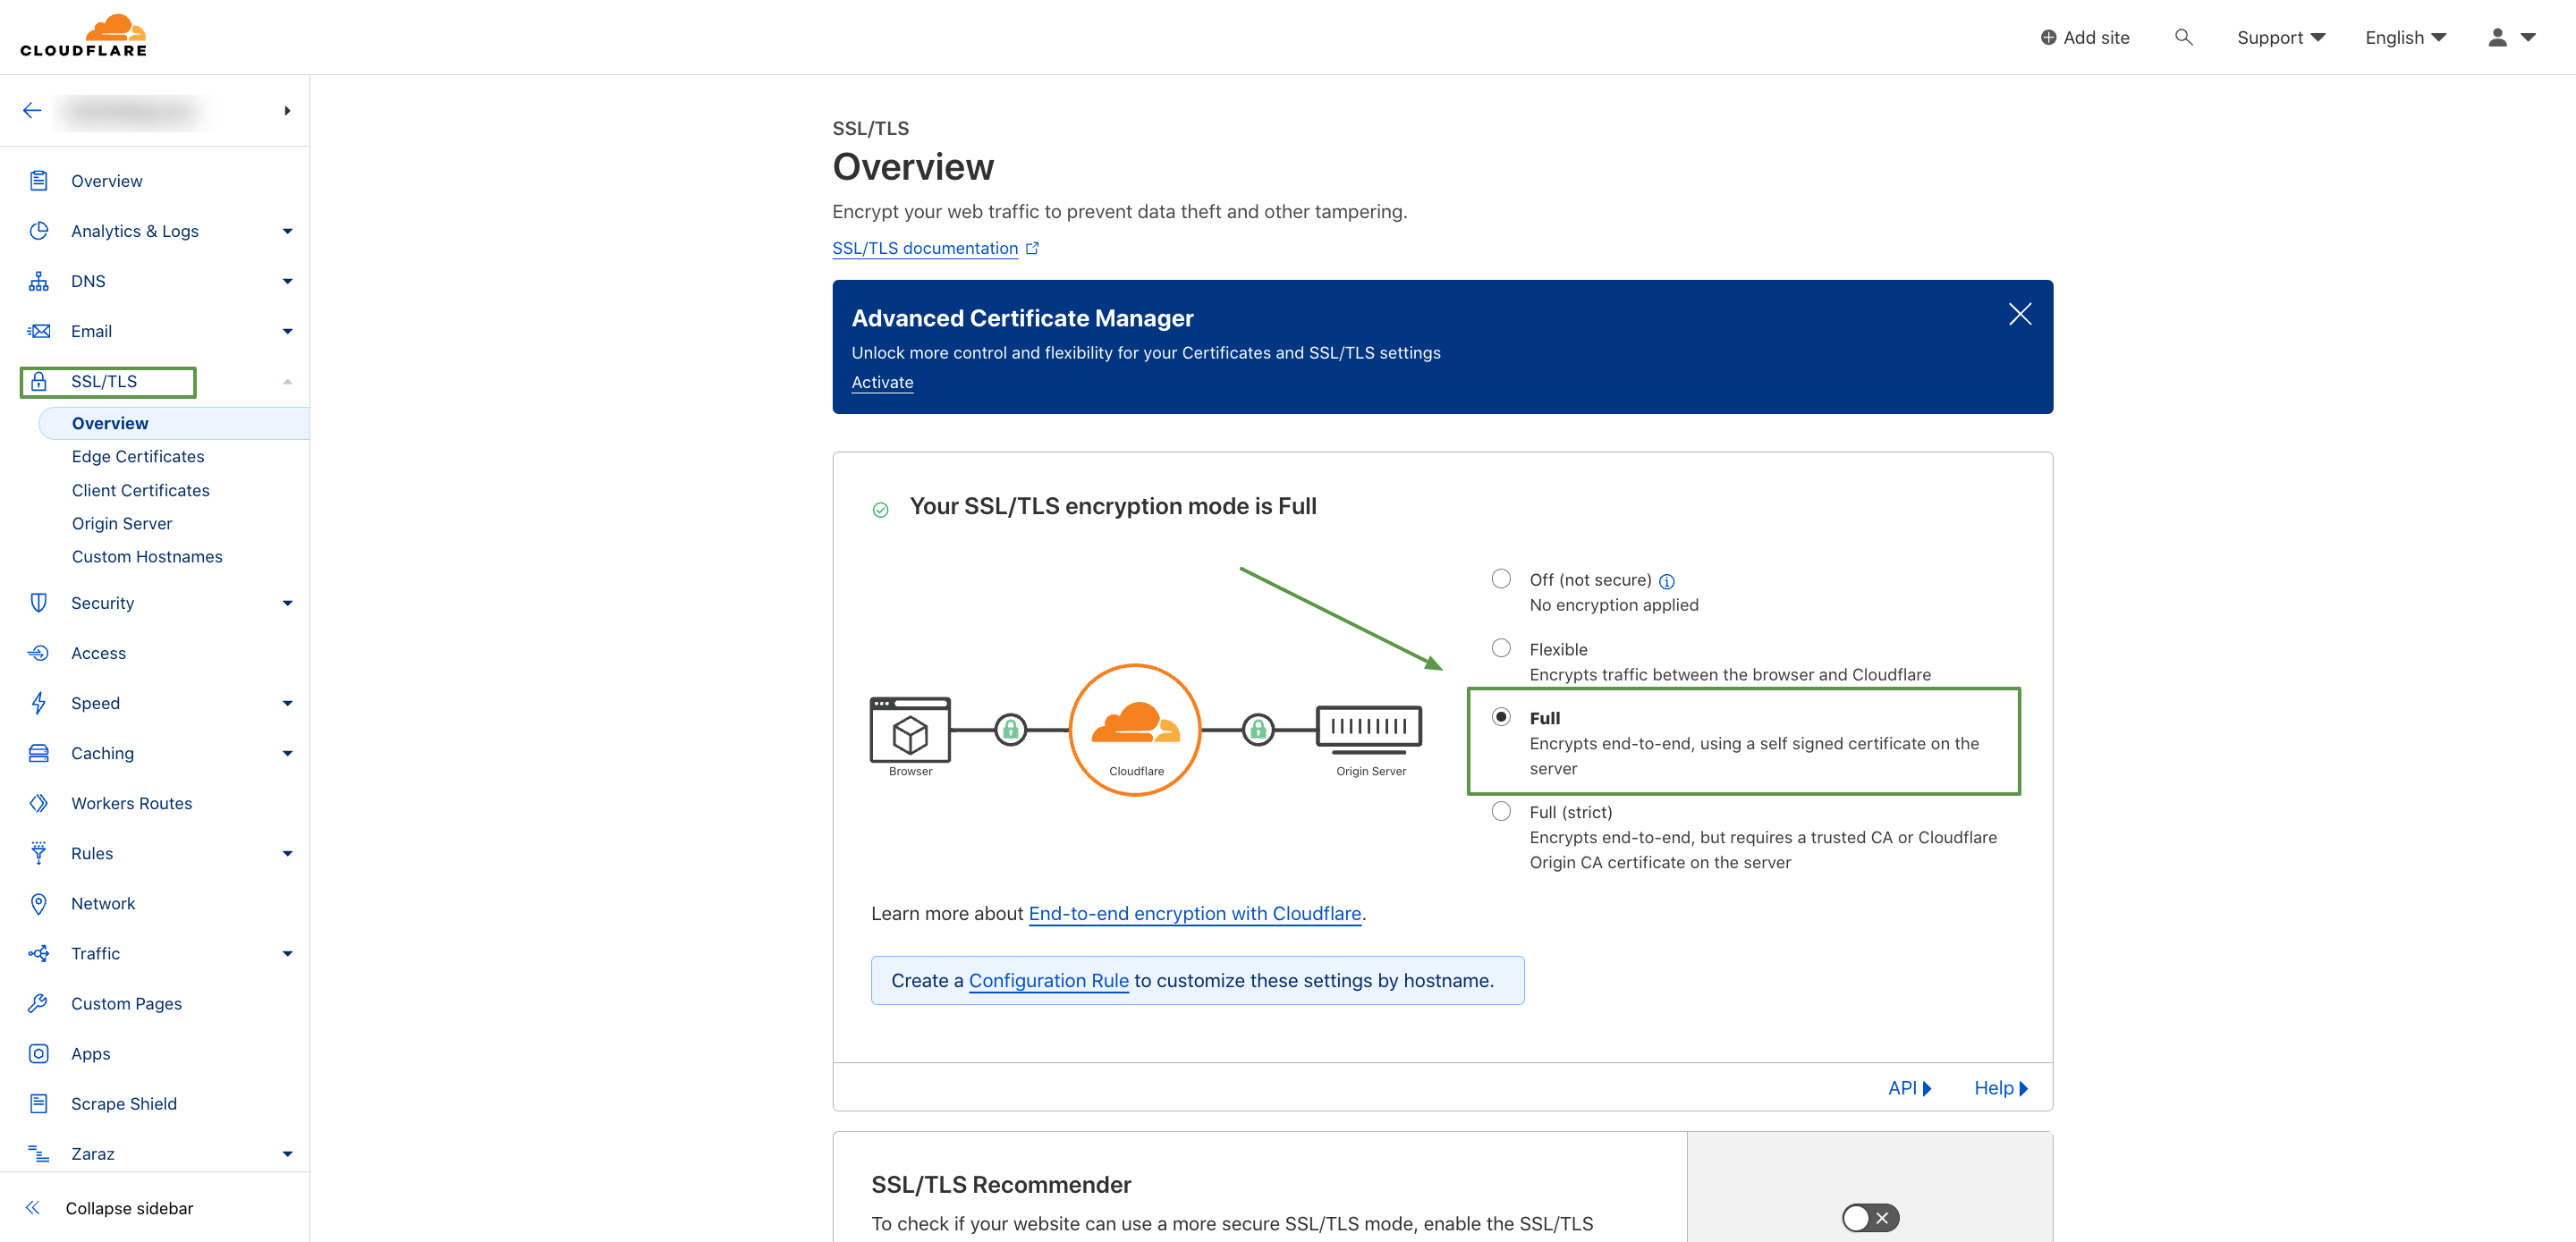
Cloudflare automatically issues an SSL certificate for your domain, this certificate becomes active immediately after you activate dns on Cloudflare and does not conflict with the certificate that is automatically issued by the tracker, although at first, you may see an error after adding a domain to the tracker:
Error: Make sure your domain has only one A record that contains your server IP and no www, AAAA, or any other DNS records. DNS records may take up to 24 hours to update.
The certificate used on the domain was issued by Cloudflare, not requested by the tracker.
In fact, if you go, for example, to the Admin Dashboard by https://domain.com/admin link — you will see a secure HTTPS connection in the URL for this domain. That is the domain is fully working and ready to use.
After NS records are updated completely the error will go away from the tracker.
# Parking the domain to the tracker
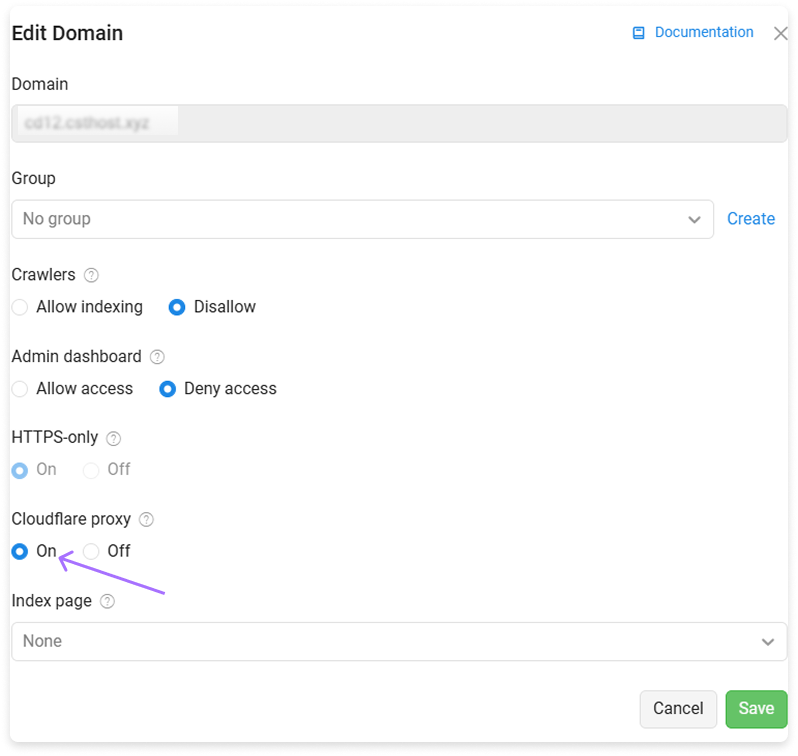
Open the tracker's admin panel and go to the Domains tab. Click on the Add button and add a new domain, remembering to turn on the Cloudflare proxy option.
Then click save and check the status:
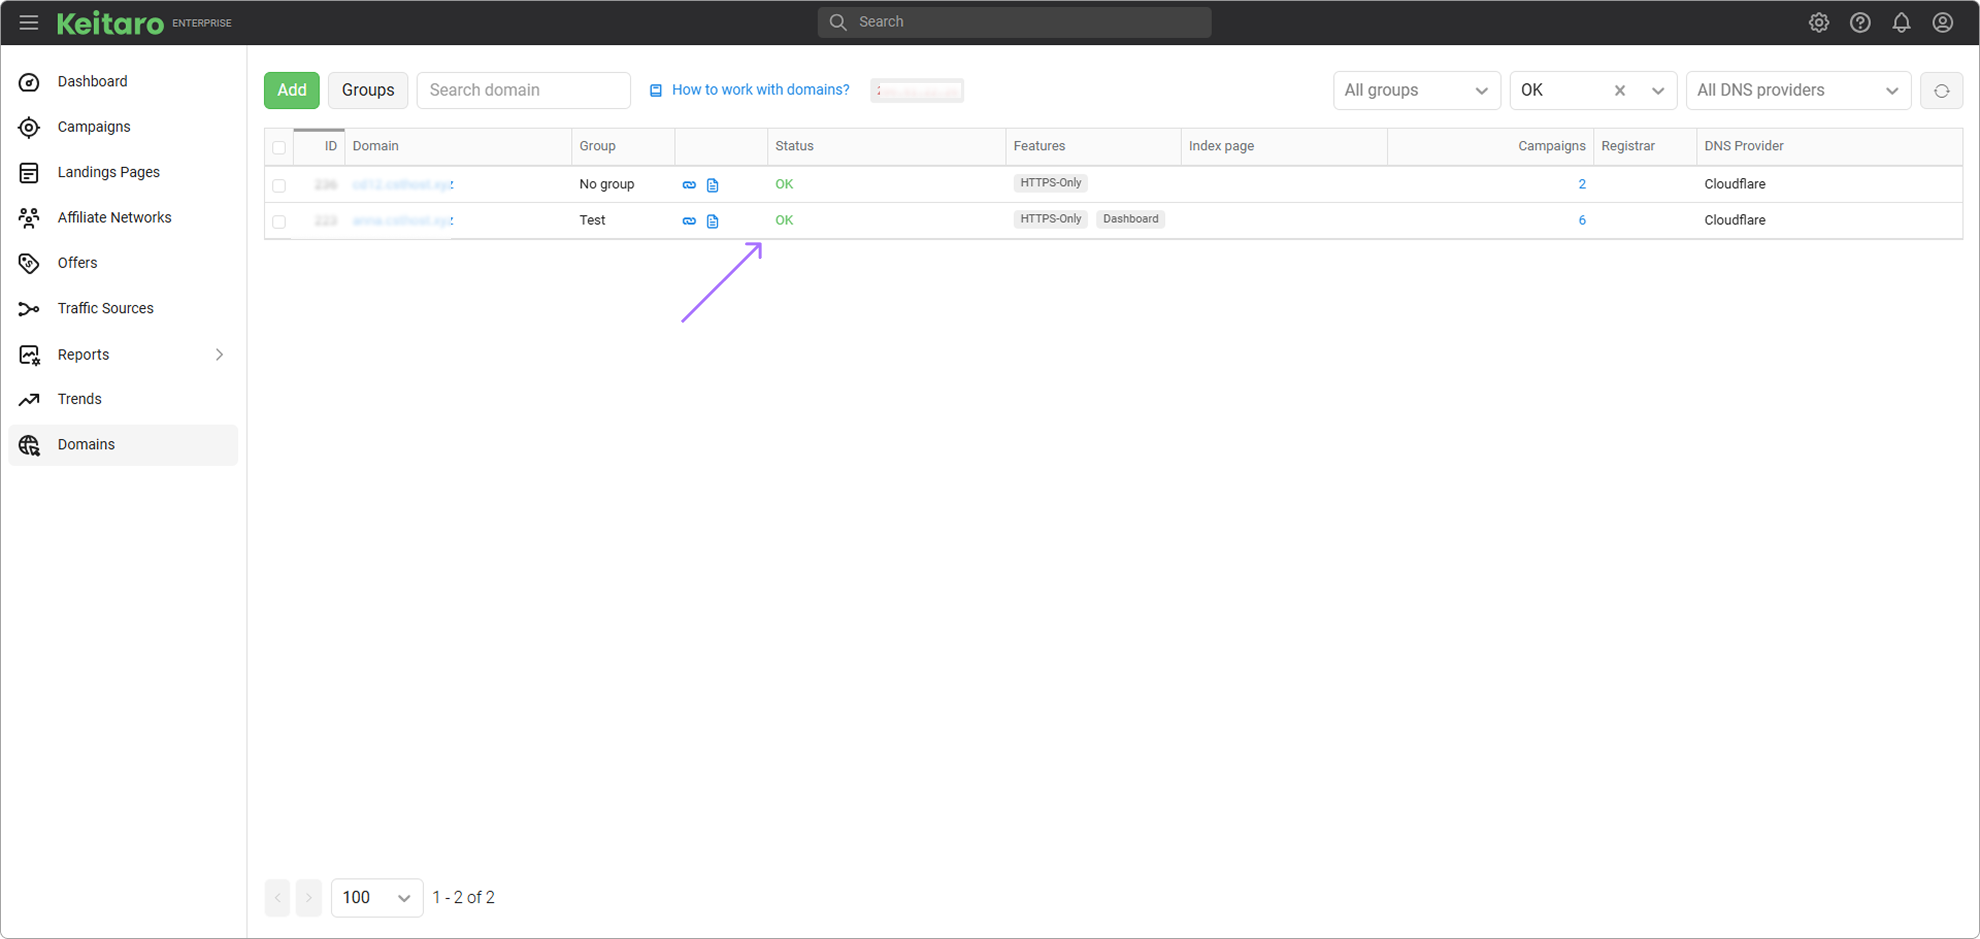
If the status is OK, it means that we have done everything correctly and the domain is ready to work.
# DDoS Attack
The primary settings to turn on malicious traffic (DDoS) filtering are located in the Security — Settings section.
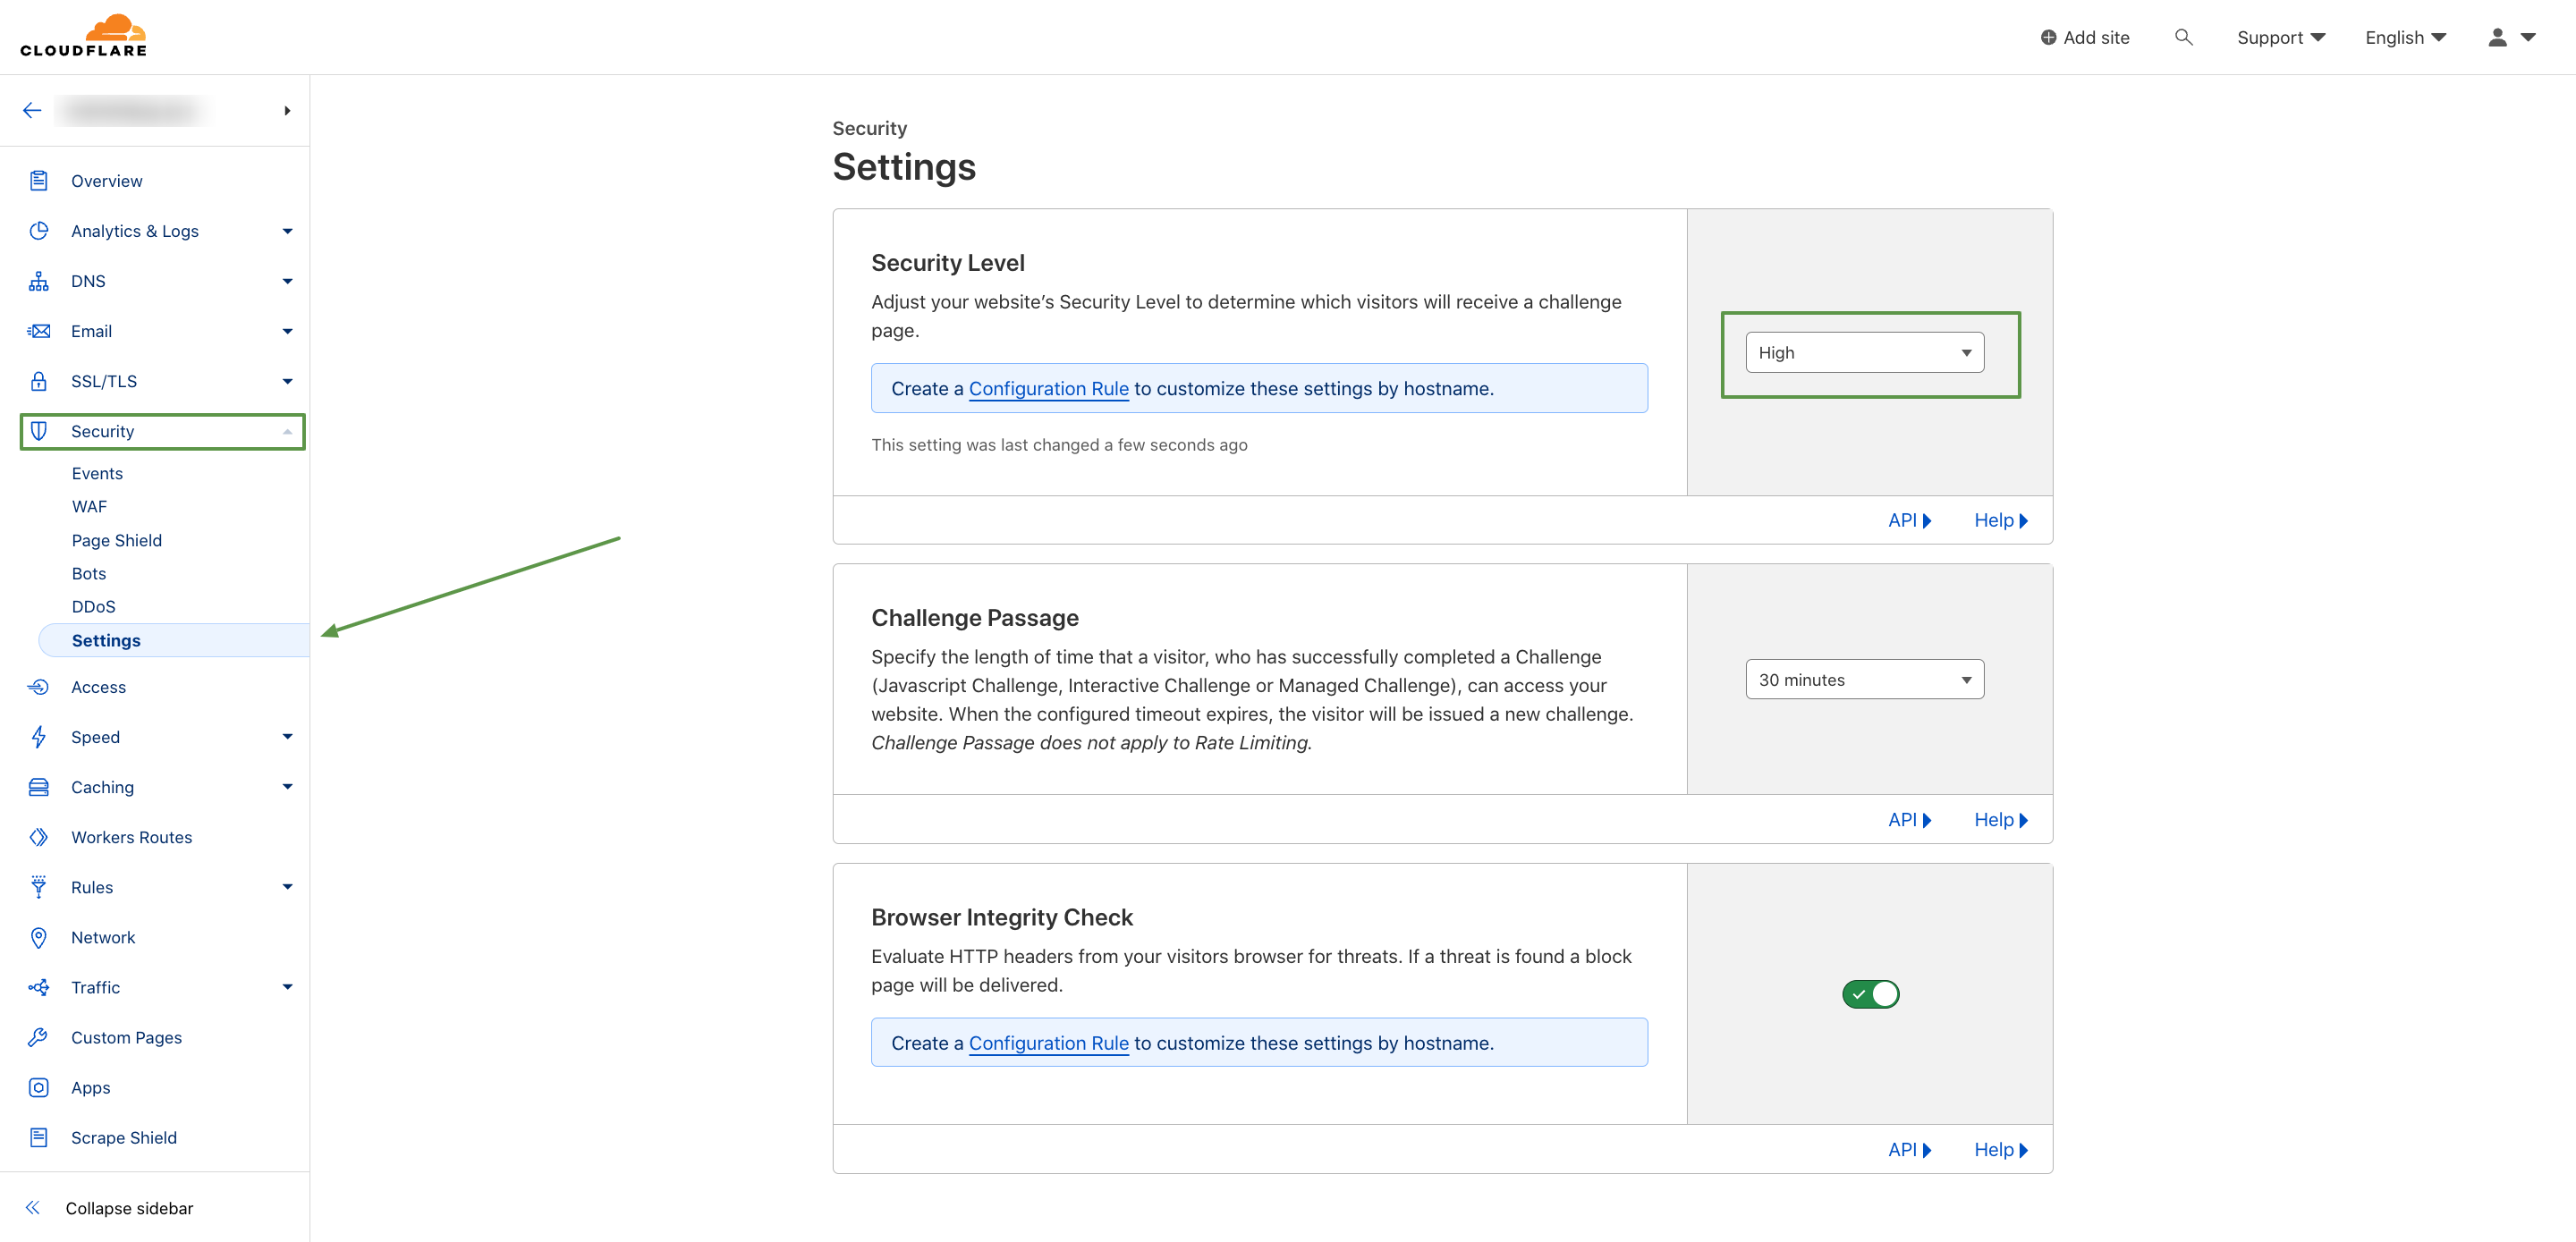
If the site is not undergoing a DDoS attack, configure the settings as shown in the screenshot (High).
If there is an ongoing attack, choose the I’m Under Attack! option in the Security Level field.
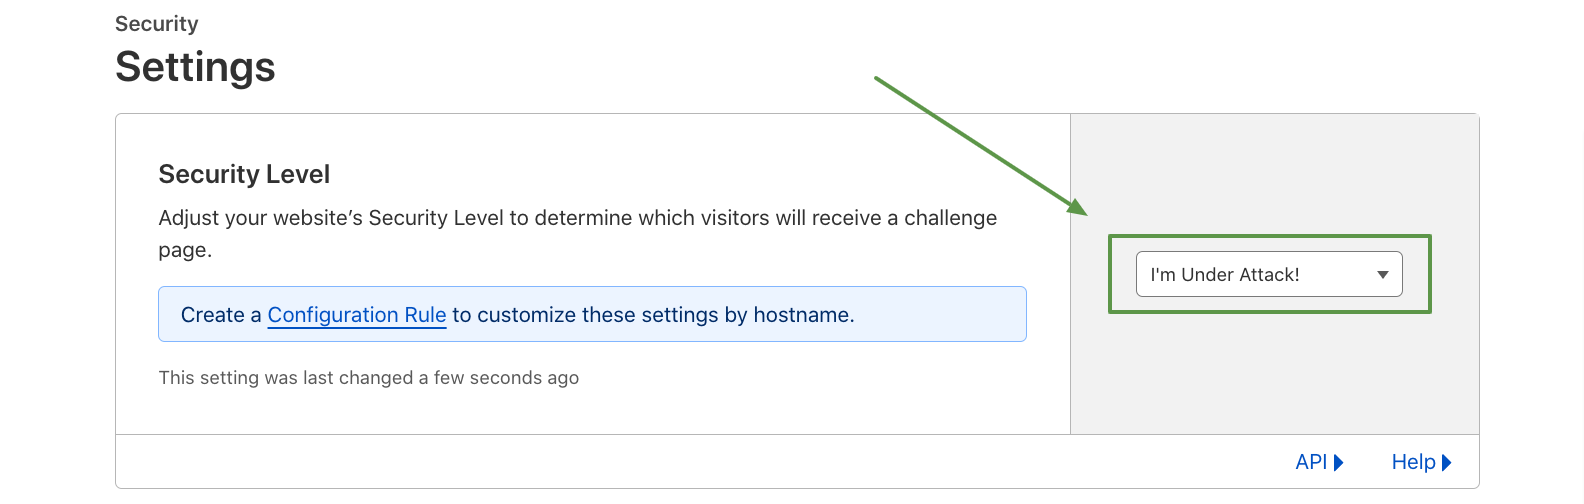
The configurations in this section impact how the website pages are displayed to users. For instance, when the I’m Under Attack! setting is applied, visitors will see a Cloudflare splash screen for the first 3-5 seconds. As the attack intensity diminishes, it is advisable to gradually reduce the protection level in the Security Level field and carefully monitor the site's status.
The effectiveness of DDoS attack protection provided by Cloudflare is achieved with the initial configuration before placing the domain on a tracker or hosting platform.